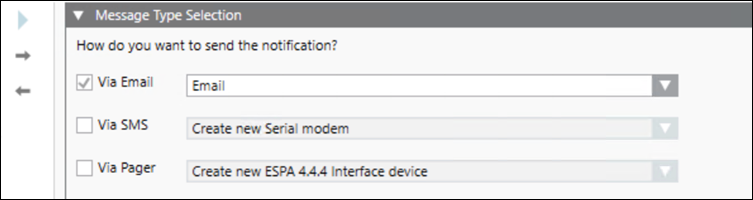
Select the desired medium to send the notification as instructed below. For example, Via Email, Via SMS and Via Pager device.
Click the Via Email checkbox for sending notification through Email. This is the default selection. Do one of the following:
If you select Create new SMTP email server and click Next page . The wizard displays Step 2. Go to Configure the Email Setting step.
If you select any existing server and click Next page . The wizard displays Step 6. Go to Trigger Rule Configuration step.
(Optional) Click the Via SMS checkbox for sending notification through SMS. Do one of the following:
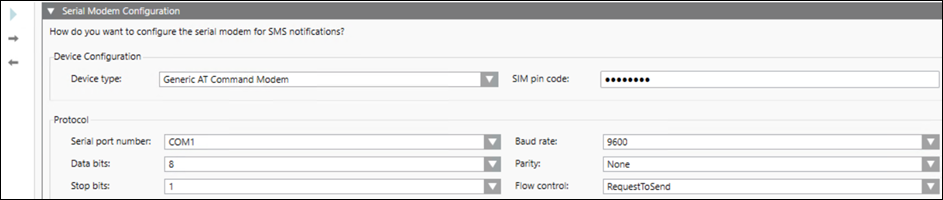
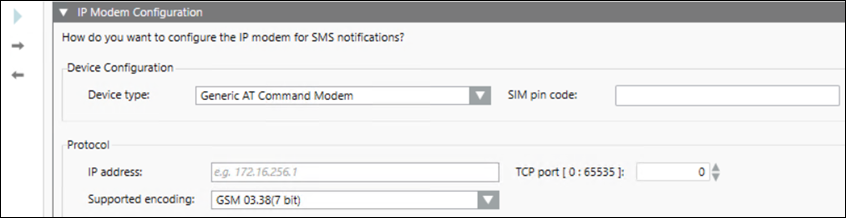
If you select Create new Serial modem or Create new IP modem (Available only for RENO Plus and MNS license users)and click Next page . The wizard displays Step 3 or Step 4 respectively. Go to Configure the Serial Modem Setting or Configure the IP Modem Setting step.
If you select any existing modem and click Next page . The wizard displays Step 6. Go to Trigger Rule Configuration step.
(Optional) Click the Via Pager checkbox for sending notification through pager. Do one of the following:
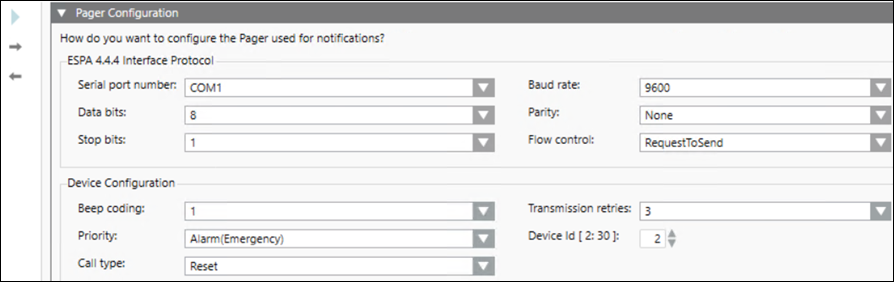
If you select Create new ESPA 4.4.4 Interface device and click Next page . The wizard displays Step 5. Go to Configure the Pager Setting step.
If you select any existing pager and click Next page . The wizard displays Step 6. Go to Trigger Rule Configuration step.
Enter the host configuration in the SMTP server host (IP address or name) field.
Select TLS, SSL or None in the Security type drop-down list.
Enter a value in the SMTP server port [1: 65535] field. The value should be in the provided range from 1 to 65535. The port number for SSL, TLS and None is 465, 587 and 25 respectively.
Enter Login ID in the Login Id field. NOTE: This field appears only when TLS and SSL is enabled.
Enter your password in the Password field. NOTE: This field appears only when TLS and SSL is enabled.
Enter the sender’s email address in the Sender email address field.
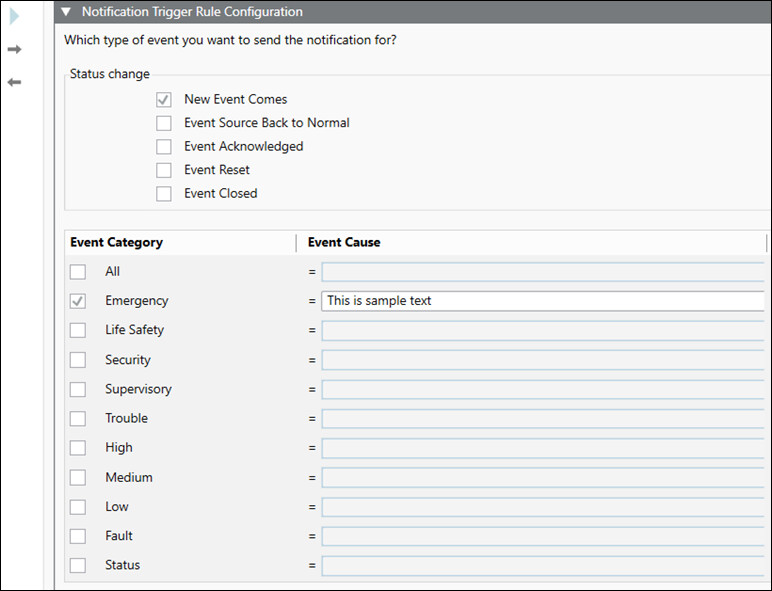
Select the event category and cause for the notification as instructed below.
Select the desired option from the Status change section. The default selection is New Event Comes.
Select the required Event Category checkbox. You can select one or multiple event categories.
Enter the cause in the Event Category field against the selected event category. NOTE: The list of Event Categories is retrieved from the client profile.
Click Next page .
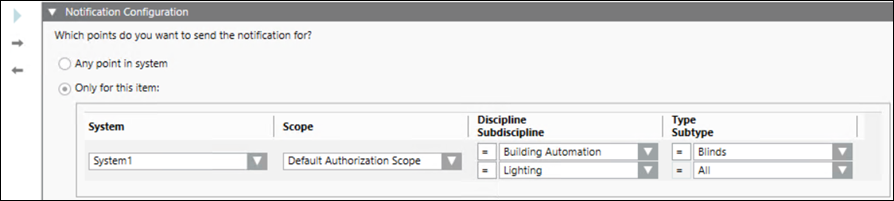
Select the Any point in system option. This is the default selection.
Select the Only for this item option and follow the below steps:
Select an online system from the displayed list in the System drop-down list.
Select the available scope from the Scope drop-down list.
Select the discipline and sub discipline of the event source from the Discipline and Subdiscipline drop-down list.
Select the object type and sub object type of the event source from the Type and Subtype drop-down list.
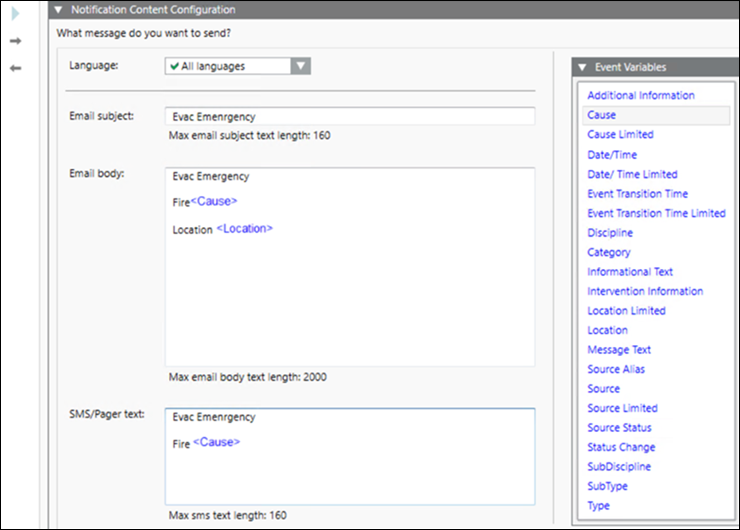
Select the desired language from the Language drop-down list. All languages is the default selection. NOTE: The default text is provided for Email subject, Email body and SMS/Pager text when you select the All languages option.
Enter the subject line in the Email subject field. The maximum subject line length is 160 characters.
Enter the email text in the Email body field. The maximum body text length is 2000 characters.
Enter the text for SMS in the SMS/Pager text field. The maximum body text length is 160 characters. Refer to the Message Content Editor section in Message Editor Tab topic for more information on configuring the message template.
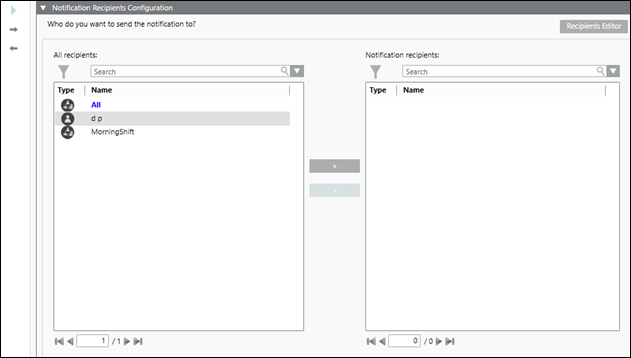
Click and select the user, depending on your specific search.
Enter a keyword in the Search field to search a specific recipient.
Select the recipients to whom you want to send the notification, and click to move the selected recipients to the Notification recipients section on the right. NOTE: You can configure new recipients using the Recipients Editor button. Refer to the Recipients topic for more information on adding recipients.
Enter the template name in the Notification template name field. This becomes the display name.
Enter a description of the template in the Notification template description field.
Select the Yes or No option to initiate other templates using the same trigger. The default selection is No. NOTE: If you select Yes, the Notification Wizard is directed to Step 8 (Configure the Message Template). You can then configure the message template, recipients and name for the new notification template.
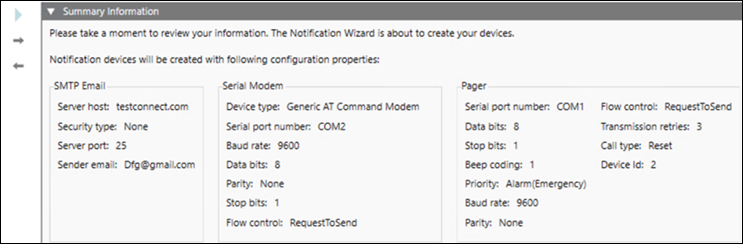
This step is visible only when you are creating new devices.
Review the device information for accuracy. If you need to modify any of it, click Previous page until you arrive at the location where you need to modify information, and then resume your Notification Wizard steps until you are satisfied with the configuration.
Review the information for accuracy. If you need to modify any of it, click Previous page until you arrive at the location where you need to modify information, and then resume your Notification Wizard steps until you are satisfied with the configuration.
Click Run Configuration.
Click Yes.
The entered configurations are created in their respective nodes in the System Browser.
 . The wizard displays Step 2. Go to Configure the Email Setting step.
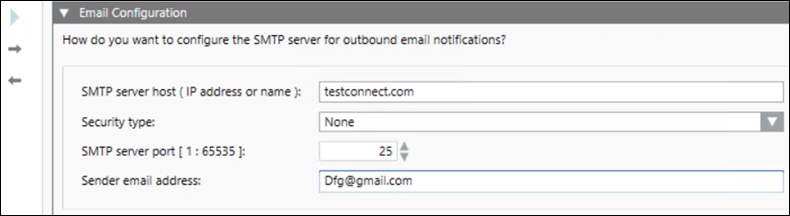
 and select the user, depending on your specific search.
  to move the selected recipients to the Notification recipients section on the right.
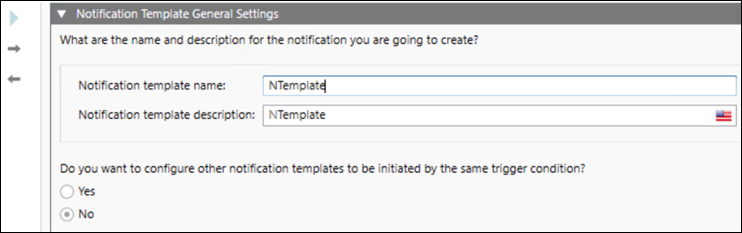
 until you arrive at the location where you need to modify information, and then resume your Notification Wizard steps until you are satisfied with the configuration.
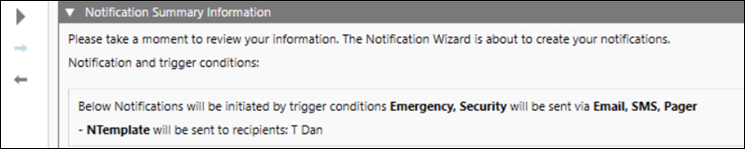
 .
.