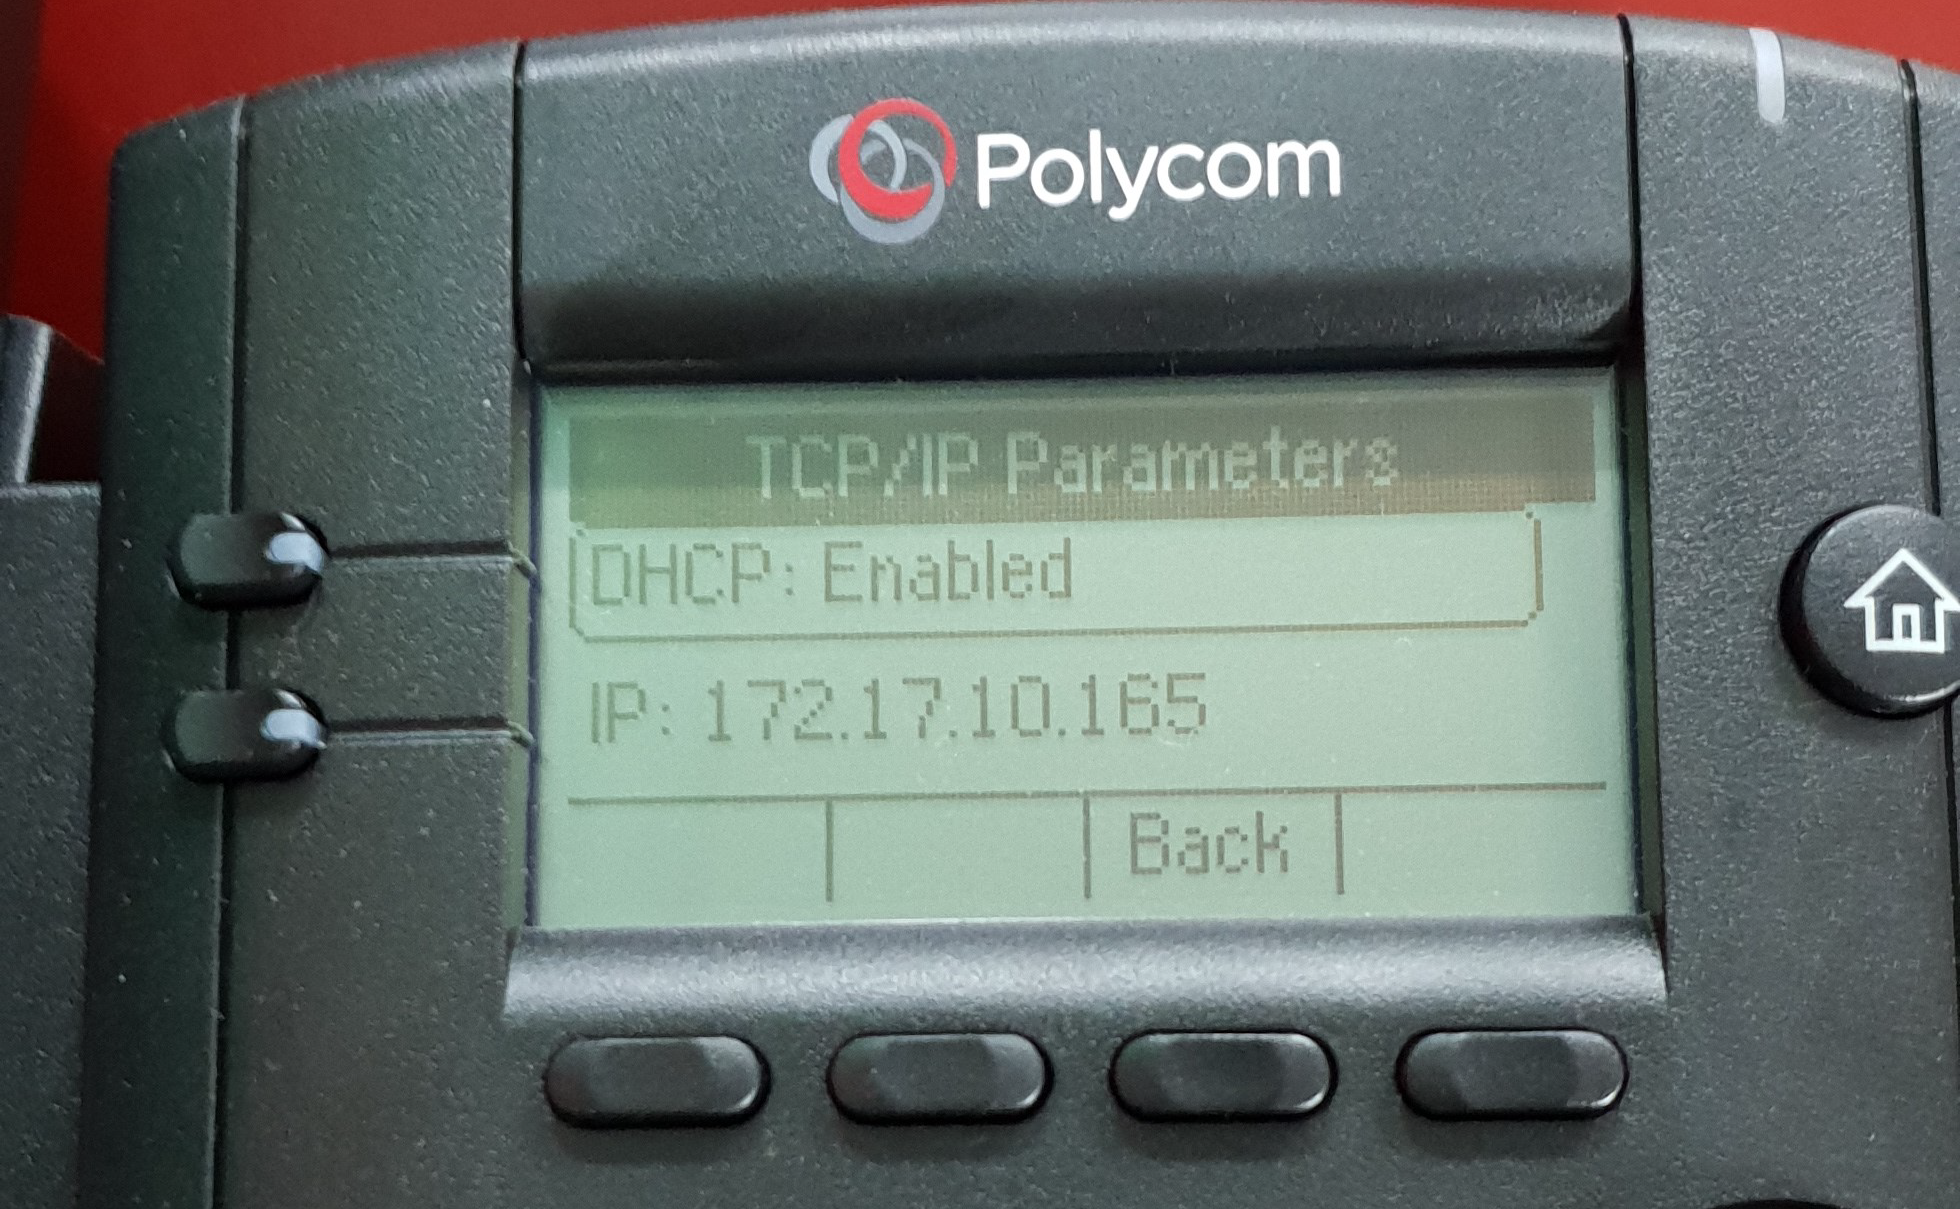
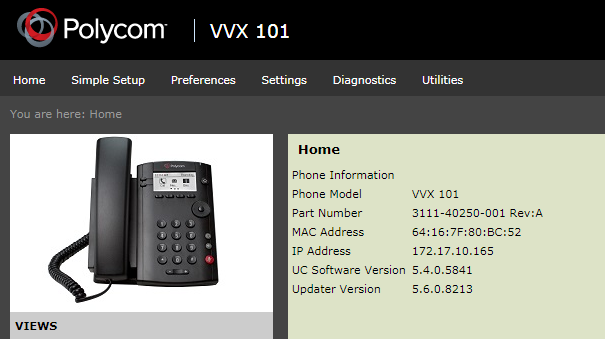
Using a web browser from a computer located on the same subnet as the IP phone, type the IP address of the IP phone into the URL and press Enter. NOTE: By default, the phone is configured for Dynamic Host Communication Protocol (DHCP). To determine the IP address, press Menu on the phone and select Status > Network > TCP/IP Parameters.
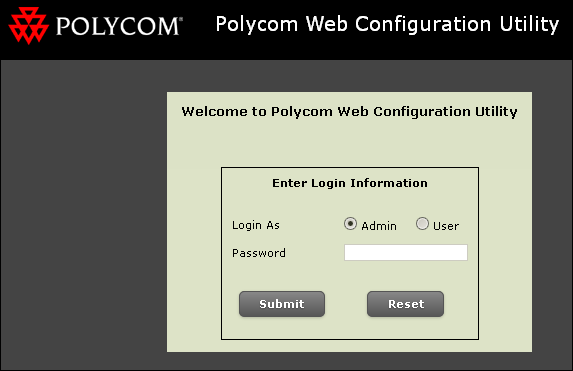
At the login page, log in as Admin using the admin password of the phone. NOTE: The factory default Admin password is 456.
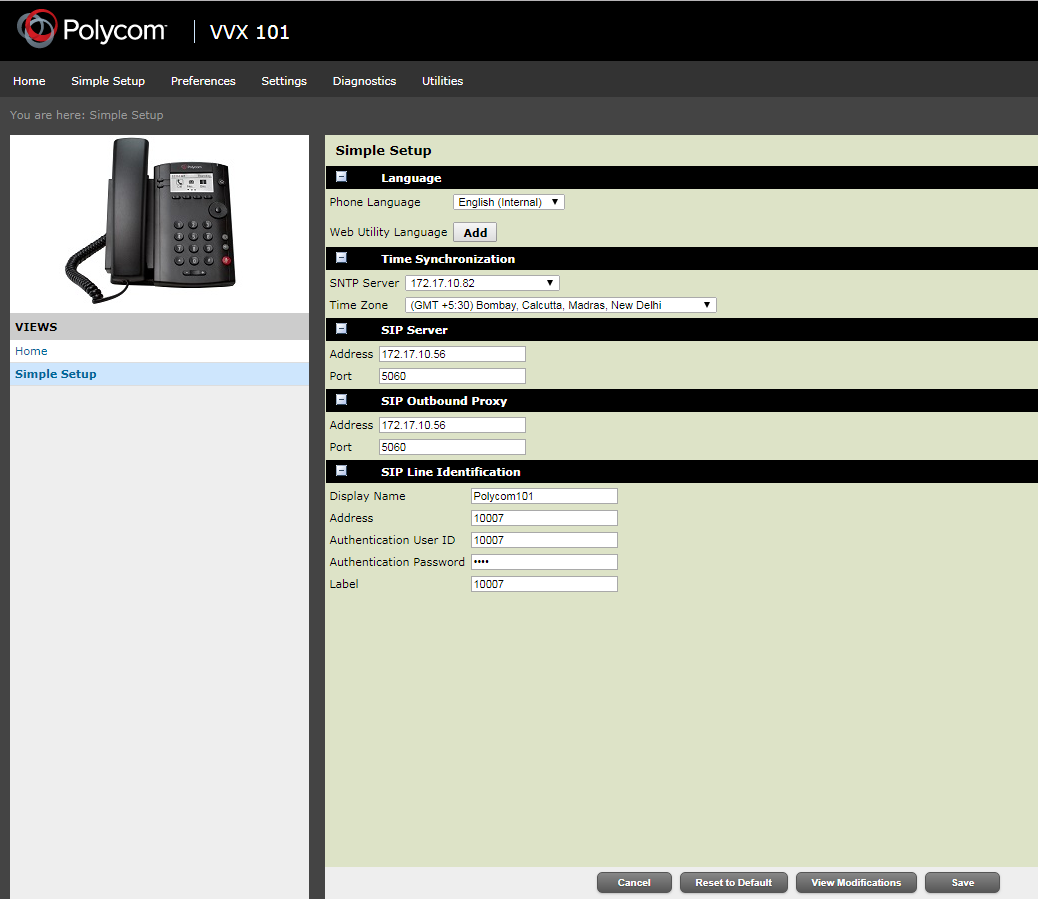
Select the Simple Setup, enter the information in the following sections.
Language Phone Language: Select the regional language to display on the phone. The default is English.
Time Synchronization SNTP Server: Select a time server from the drop-down menu. Alternatively, manually enter the IP address of a Simple Network Time Protocol (SNTP) server. The SNTP server is required when using certificates for Secure Socket Layer/Transport Layer Security (SSL/TLS). Time Zone: Select the time zone in the local region.
SIP Server Address: Enter the IP address of the Session Internet Protocol (SIP) server. By default, this is the Notification server IP address. Port: Enter the port number for SIP. The default is 5060. If configuring the phone for TLS certificates, the default port will be 5061.
SIP Outbound Proxy Address: Enter the IP address of the Session Internet Protocol (SIP) server. By default, this is the Notification server IP address. Port: Enter the port number for SIP. The default is 5060. If configuring the phone for TLS certificates, the default port will be 5061.
SIP Line Identification Display Name: Enter a name to be displayed by the phone to the SIP Server. This is used during Caller ID. Address: Enter the extension number assigned to the phone. Authentication User ID: Enter the extension number assigned to the phone. Authentication Password: Enter the password assigned to that particular extension. Label: Leave blank. NOTE: If this has not already been done, use the FreeSwitch Configuration tool included with the management station to create an extension for the IP Phone to use. This can be done before or after configuring phone. If done afterwards, note the extension and password used on the IP Phone so that the extension can be properly created in FreeSwitch. Details on how to use this tool are documented in the Telephony Configurationsection.
Base Profile Select Generic from the drop-down list.
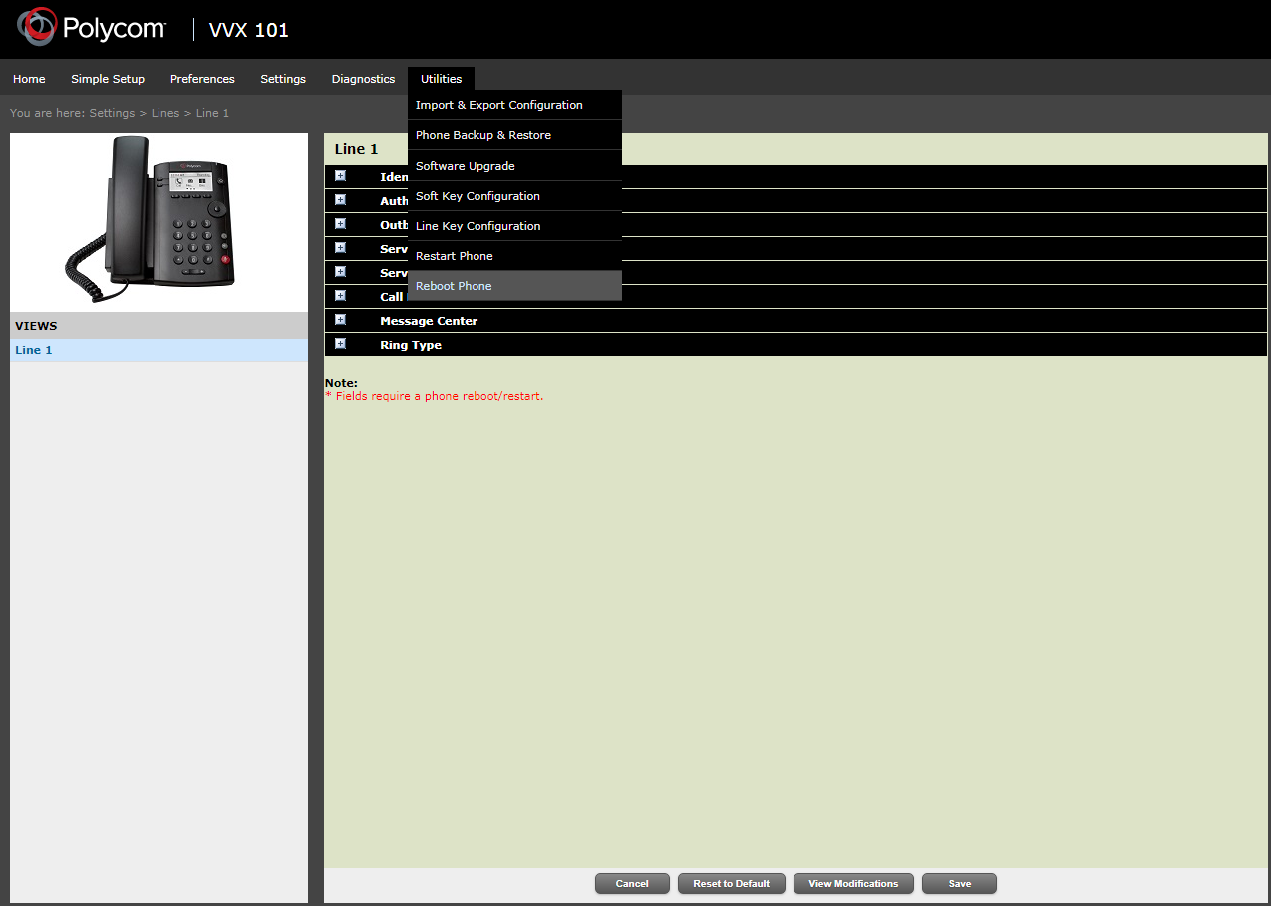
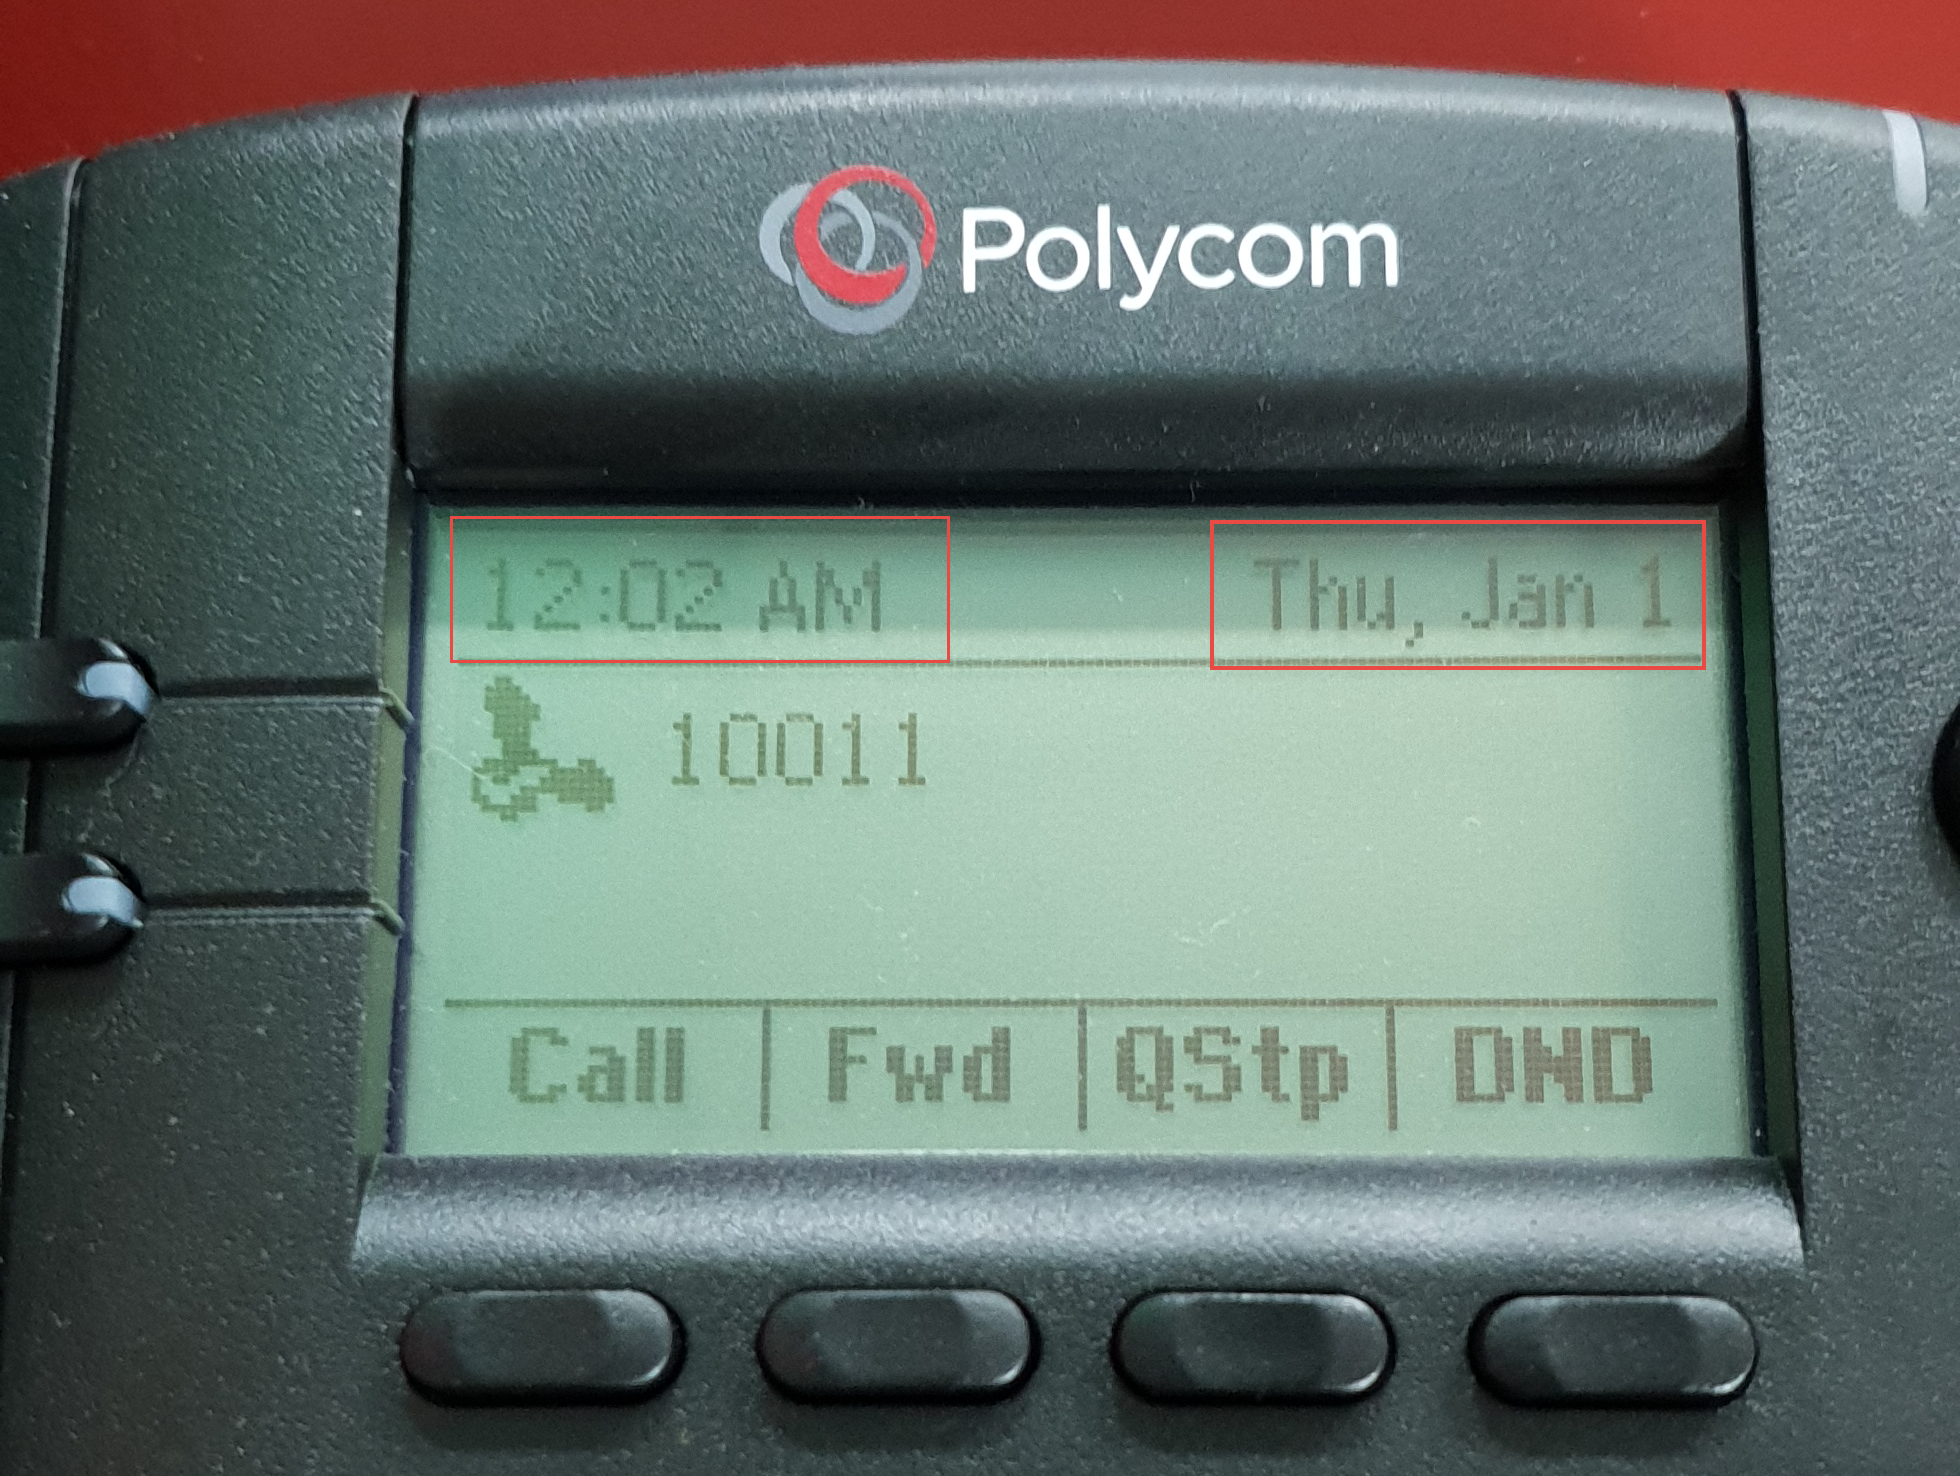
A message Reboot initiated is displayed on the IP phone. If successful, the IP phone will display the correct time and its extension number of the phone.
NOTE 1: The phone symbol on the phone screen will appear filled in, if the configuration is successful. NOTE 2: If the configuration is not completely successful, the phone symbol will appear hollow on the phone screen.
Perform the following steps to verify if the green dot appears next to the extension used by the IP phone:
Open the Telephony Configuration Tool. NOTE: The Telephony Configuration Tool is installed with Notification.
Verify that the green dot appears next to the extension used by the IP phone. This green dot signifies that the device is properly connected and registered with Notification‘s integrated PBX, FreeSwitch. NOTE: For details on how to use the Telephony Configuration Tool to verify the connection status for a device, see the Telephony Configuration.
Perform the following steps to configure IP phones with separate extensions: a. Configure two IP phones with separate extensions. For example, configure IP phone A with extension 10010 and IP phone B with extension 10020. b. Use one IP phone to call the other. For example, using IP phone A, dial the extension 10020. c. Verify that the audio and the microphone are working properly on each end.