Configuring Properties in Object Models or Functions
In the Models & Functions tab, you can configure the properties of the object model or Function selected in System Browser. For reference information, see Properties Expander and Property Details Expander.
NOTE: Settings marked with * are available only for object models, not for functions.
- In System Browser, select Project > System Settings > Libraries > [... ] > [object model or function].
- Select the Models & Functions tab.
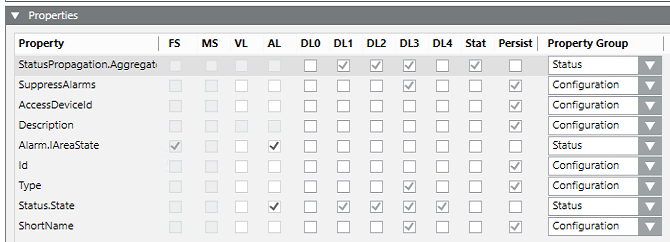
- The Properties expander displays a list of all the properties of the selected object model or function.
- To configure logging for a property:
- Select the VL check box to enable value logging for this property.
NOTE: Trending data can impair your network communications.
- Select the AL check box to enable activity logging for this property.
- Use the DL (display level) check boxes to set the visibility of a property (for more details, see Properties Expander).
- DL0* (Configuration: Engineering mode expanders).
- DL1 (Reduced: Status and Commands window in graphic).
- DL2 (Standard: Operation).
- DL3* (Details: Extended operation).
- DL4* (Exposed to north-bound interfaces such as OPC server)
- Select the Status check box if you only intend to display the off-normal state (the function is defined in the Details expander).
- Select the Persist* check box if you only intend to save the property value to have such value immediately available after a system restart.
- In the Property Group, select an option for the security setting:
- Status, Configuration, Diagnostic or Ownership.
- Repeat the preceding steps for each property you want to configure.
- Click Save
 .
.


The FS (field system alarm) and MS (Management Station alarm) check boxes cannot be selected here.

- In System Browser, select Project > System Settings > Libraries > [... ] > [object model or function].
- In the Models & Functions tab, open the Properties expander.
- In the Property list, select the property you want to configure.
- Open the Details expander.
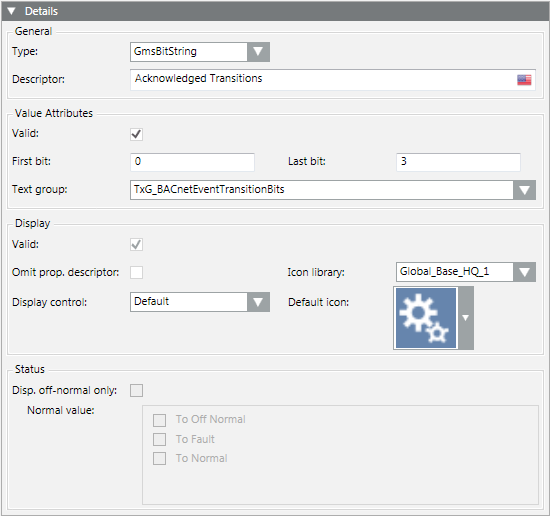
- From the Type drop-down list, select the data type for this property. Whenever possible select a Gms data type.
- The Value Attributes group box displays the configuration fields for the selected property Type.
- In the Value Attributes group box:
- Select the Valid check box to enable the configuration.
- Enter the values into the various fields, for example Min, Max, Resolution. For details, see Value Attributes for Different Property Types.
- Select the text group. New or updated text groups must be refreshed by pressing the F5 key
- Click Save
 .
.

It is possible that not all attributes of non-GMS data types are saved to the database during data import.
- In System Browser, select Project > System Settings > Libraries > [... ] > [object model or function].
- In the Models & Functions tab, open the Properties expander.
- In the Property list, select the property you want to configure.
- Open the Details expander.
- In the Display group box, select the Valid check box to enable configuration of the fields.
- In Omit prop.descriptor, set whether to omit or display the property descriptor:
- check box cleared: The property description, such as Present Value, is displayed alongside the symbol.
- check box selected: The description is not displayed.

- Select the Display Control as per the selected data type.
- Default

- Priority Array

- Event Time Stamp

- From the Icon library drop-down list, select the appropriate library.
- Select the icon under Default Icon. The selected icon is displayed in the viewers with the given property.
NOTE: The icon is overwritten if an icon is defined in the Enumeration or Boolean text group.
- Click Save
 .
.

You can define what constitutes the normal status for a property, and whether to display the property always, or only when it is off-normal.
- In System Browser, select Project > System Settings > Libraries > [... ] > [object model or function].
- Select the Models & Functions tab.
- Open the Properties expander.
- In the Property list, select the property you want to configure.
- Select the Stat check box alongside that property. This enables configuration of the Status fields in the Details expander.
- Open the Details expander.
- In the Status group box:
- Define the Normal value for this property, as per its data type (GmsReal, GmsBitString, GmsEnum). See Normal Value Entry Fields.
- Select Disp. Offnormal only to display this property only when off-normal. Otherwise clear the check box to display this property always.
- Click Save
 .
.
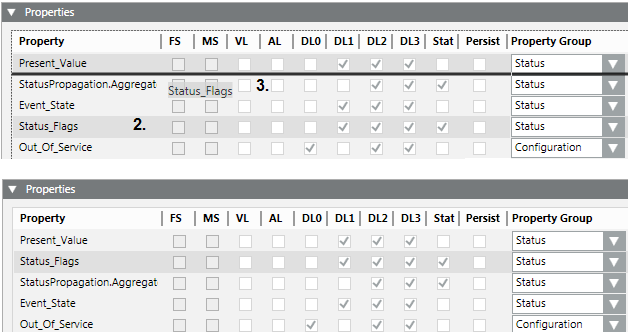
You can customize the order in which the properties are displayed in Desigo CC.
- In System Browser, select Project > System Settings > Libraries > [... ] > [object model or function].
- In the Models & Functions tab, open the Properties expander.
- Select the property you want to move.
- Drag-and-drop the property to the desired location in the list.

- Repeat the process for all properties to be moved.
- Click Save
 .
.

To reset an edited sequence to the default setting, right-click any property and select Reset property list to original order.

NOTE 1:
Properties dependent on data type are removed if the data type is changed on an existing object model using the Models & Functions tab. This affects the Alarm Configuration, Function, and the applicable instances. The objects must be post-processed to function correctly.
NOTE 2:
A data type on an existing object model is highlighted in red in the Property expander if it is not changed using the Models & Function tab. Save the object model to refresh the instances using the default value of the newly selected data type.
