Configuring Macros
Scenario: You want to configure a macro to execute a sequence of commands or operations with a single action.
Reference: For background information, see the reference section.
Workflow diagram:
Prerequisites:
- System Manager is in Engineering mode.
- System Browser is in Application View.
Steps:
You can store macros directly in the main Macros folder, or you can create a structure of subfolders under it to organize your macros.
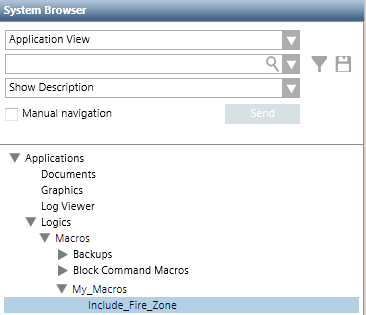
- Select Applications > Logics > Macros or a subfolder under it.
- The Macro tab displays.
- Click New
 .
.
- In the New object dialog box, enter a name and description.
- Click OK.
- The new folder is added to System Browser.
- Repeat the preceding steps for any other folders you want to add.

You can select an existing macro to modify, or begin configuring a new one from scratch.
- Do one of the following:
- To create a new macro, select Applications > Logics > Macros or a subfolder under it.
- To modify an existing macro, select Applications > Logics > Macros > […] > [macro].
- The Macro tab displays.

Each macro instruction occupies one row, and comprises a set of fields (Scope/Target, Property, Command, and so forth) defining a command that will be issued when that instruction is executed. A macro must include at least one instruction before you can save it.
- In System Browser, select the Manual navigation check box.
- Drag a desired target object from System Browser into the empty area inside the Macro tab. This will create a new row.
- Configure the other fields in the row to set what Property of the Target objects will be affected, and the Command to send.
- (Optional) Filter by Discipline/Subdiscipline and Type/Subtype. This will cause the command to only be sent to target objects that match those criteria.
- (Optional) In the Initial Delay field, set the delay before the command is sent out.
- Repeat steps 1-5 above to add other instructions.
The instructions of a macro are executed in order from top to bottom. You can make adjustments as follows.
- To change the order of the instructions, select a row and click Move up or Move down.
- To alter an existing instruction, click its row and define its fields (such as Scope/Target, Property, Command, and so forth) as required.
- To delete an instruction, select its row and click Delete.
- Click Save
 or Save As
  .
.
- (Only for Save As) In the Save Object As dialog box:
a. Select the main Macros folder or a subfolder under it.
b. Enter a name and description.
c. Click OK.
- Newly created macros are enabled by default. To disable a macro to prevent it from executing for the time being, see Enabling or Disabling Macros.
